§. 下载 / Download
§. 开始第一个APP创建
- 第一种方式:手动创建空项目:
- 将CBlueUI.h头文件,所在目录添加到包含目录中
- 将CBlueUI.lib文件,所在目录添加到链接目录中
- 将CBlueUI.dll文件,拷贝到和APP同级目录下。或者添加到系统环境变量。任选一个即可
- 第二种方式:使用CMake工具导入该库
- CMake是简单易学的工程构建工具。可自动生成各类开发工具的工程文件。请自行前往CMake官网下载.
- 您也可以直接链接,集成到成熟的产品项目中
list(APPEND CMAKE_PREFIX_PATH "library_dir") # 替换library_dir为库解压目录
find_package(CBlueUI) # 添加依赖关系
target_link_libraries(${target} CBlueUI) # target 为输出目标
- 发布的产品包含demo源码。可直接用cmake构建 注意:切换工程到release模式,否则运行会异常。 C++标准发展时间简史。
C++98和C++11:是使用最广的标准。版本越低兼容性越好。版本越高,代码可塑能力越强,更灵活。在底层嵌入式开发中有些编译器未必支持最新的标准。在实际开发中标准的选择,能为后期迁移代码平台减少不必要的麻烦
§. 快速了解CBlueUI
这里挑出来一些常用的类。想看详细类介绍。请在搜索框中直接检索类名
系统初始化
在主函数入口(main)中初始化。结构包含类控件生命周期,各种资源管理的对象。 程序退出时自动释放所有资源。下图例子完整源码。已和产品一并发布。
void main()
{
UISystemStartUp uistartup;
InitializeUISystem(&uistartup);
CToastBox toastBox;
InstallToastBox(&toastBox);
const char* res_file = "../res/image_def.xml";
XmlBuilder::ApplyResourceWithFile(res_file);
}
XML和JSON格式解析
分为 XmlStorageA 和 XmlStorageW 版本
- 从内存缓冲区解析
int LoadBuffer(
const char* xml_text,
int len = -1,
BOOL no_write =
FALSE);
int LoadBufferJson(
const char* json_text,
int len = -1,
BOOL to_xml =
FALSE);
- 例子
XmlStorageA templateUI("../res/image_def.xml");
const XMLItemA* pRoot = templateUI.Root()->first_child;
while (pRoot)
{
pRoot = pRoot->next_sibling;
}
时间工具
用于计算任务的时间性能。单位毫秒
CTimeElapsed spand;
spand.Start();
double cost_time = spand.GetElapsedMicroseconds();
定时器任务
auto func_anim = [this]() {
};
m_anim_timer.
SetTimer(func_anim, ms, 100, 0);
时间戳
bool is_utc = false;
int timezone = 0;
文件IO和日志
命名空间。
读取文件
FileReader resfile;
#ifdef _WIN32
resfile.LoadImageFromResource(::GetModuleHandle(NULL), _Txt("IDR_XML_IMAGEDEF"), _Txt("XML"));
#endif
TCHAR* full_path = _Txt(
"");
resfile.LoadFile(full_path);
DataBuffer dbffer = resfile.GetDataBuffer(
TRUE);
写入文件
FileWriter writer;
TCHAR* file_name_utf8 = _Txt(
"");
writer.OpenFile(
const TCHAR* filename,
const TCHAR* mode);
writer.PrintfChar("hello china. %d", 365);
writer.Close();
日志管理
LoggerStorage log_file;
log_file.InitFileLogger("./log/log_test.html");
for (size_t i = 0; i < 200000; i++)
{
log_file.PrintLogA(LogLevel::LogLevel_TRACE,
TRUE, __FILE__, __LINE__,
"test.....");
log_file.PrintLogA(LogLevel::LogLevel_DEBUG,
TRUE, __FILE__, __LINE__,
"test.....");
log_file.PrintLogA(LogLevel::LogLevel_INFO,
TRUE, __FILE__, __LINE__,
"test.....");
log_file.PrintLogA(LogLevel::LogLevel_WARN,
TRUE, __FILE__, __LINE__,
"test.....");
log_file.PrintLogA(LogLevel::LogLevel_ERROR,
FALSE, __FILE__, __LINE__,
"test.....");
log_file.PrintLogA(LogLevel::LogLevel_FATAL,
FALSE, __FILE__, __LINE__,
"test.....");
log_file.LoggerFlush();
}
数值和字符操作
UTF8格式字符串。详情请参考类文档
UTF16格式的unicode字符串。常用字符基本为两个字节(一个宽字符)。这很重要。在遍历宽字符时,应该判断字符字节长度。而不是简单的自增(+1)。这个做实验也很简单。感兴趣的可以动手验证。 详情请参考类文档
固定缓冲区字符操作类。当字符超过固定大小时,才分配内存 优点:在栈空间处理短字符串。避免频繁操作形成堆内存碎片
同上
char tempdata[1024];
szbuf.init("hello-");
szbuf.append("china");
UtilsString为命名空间。并非类名。详情请参考类文档
- 多字符集之间转换 相同的符号在不同的字符集中,对应的码点(codepoint)不一样。这里变换后会改变码点。编码方式不变。
#ifdef WIN32
return _access(folder, 0) != -1;
#endif
- 宽字符转换为多字节字符
- 多字节字符转换为宽字符
- 字符串分词拆分。通过单个字符匹配
std::vector<std::string> SplitWithCharA(
const char* str,
const char* pattern,
int count = 0,
BOOL skip_bracket =
FALSE);
std::vector<std::w16string> SplitWithCharW(
const WCHAR* str,
const WCHAR* pattern,
int count = 0,
BOOL skip_bracket =
FALSE);
- 字符串分词拆分。通过字符串匹配
UI_EXP std::vector<std::string> SplitWithTextA(std::string str, std::string pattern,
int count = 0);
UI_EXP std::vector<std::w16string> SplitWithTextW(std::w16string str, std::w16string pattern,
int count = 0);
2D、3D变换矩阵
二维变换矩阵。平移,缩放,斜切。
Transform2d img_mtx;
int cx = 100;
int cy = 100;
double scale_x = 2.0;
double scale_y = 2.0;
img_mtx *= Transform2dTranslation(-cx, -cy);
img_mtx *= Transform2dScaling(scale_x, scale_y);
img_mtx *= Transform2dRotation(angle);
img_mtx *= Transform2dTranslation(cx, cy);
double x0 = 10, y0 = 10;
img_mtx.transform(&x0, &y0);
三维变换矩阵。平移,缩放,斜切。
float ratio = 16.0 / 9.0;
);
Mscreen.
r[0].
f[0] = width / 2;
Mscreen.
r[1].
f[1] = height / 2;
Mscreen.
r[0].
f[3] = (width - 1) / 2 + rc_diagram.left;
Mscreen.r[1].f[3] = (height - 1) / 2 + rc_diagram.top;
渲染引擎
在AGG2.4的基础上新增3D算法。优化内存。魔改之后的版本功能更全。 产品发布包含了第三方绘图引擎的协议许可。
在NanoVG的基础上新增3D算法。纹理的切线贴图。高斯模糊,放大镜特效,阴影特效。
仅Window平台可用。DirectX在window平台上表现同样丝滑。
绘图接口 包含基本绘制图元的函数。请检索查阅详情。
virtual void FillRect(
RECT rc,
const GColor& color);
位图对象
bool LoadBufferImage(
unsigned char* buffer,
UINT dwSize);
颜色对象
几何路径对象
void PathMoveTo(double x, double y);
void PathLineTo(double x, double y);
void PathHLineTo(double x);
void PathVLineTo(double y);
void PathArcTo(double x, double y, double rx, double ry, double a1, double a2, bool ccw = true);
void PathJoinArcTo(double x, double y, double rx, double ry, double a1, double a2, bool ccw);
void PathPie(double x0, double y0, double rx, double ry, double a1, double a2);
void PathRing(double x0, double y0, double rx, double ry, double a1, double a2, double dis);
void PathRingRound(double x0, double y0, double rx, double ry, double a1, double a2, double dis, double round = PI / 45);
void PathEllipse(int cx, int cy, int rx, int ry);
界面构解析器
控件和资源解析器
注意:若UI文件中使用了全局资源。应该先加载资源。
- 全局资源加载
const char* res_file = "../res/image_def.xml";
XmlBuilder::ApplyResourceWithFile(res_file);
- 控件解析
const char* main_xml_file = "../res/00_uidemo.xml";
UIManager m_manger;
C00_uidemoHandler mainHandler(&m_manger);
XmlBuilder parse;
parse.LoadUIFileA(main_xml_file, &m_manger, NULL, NULL, &mainHandler);
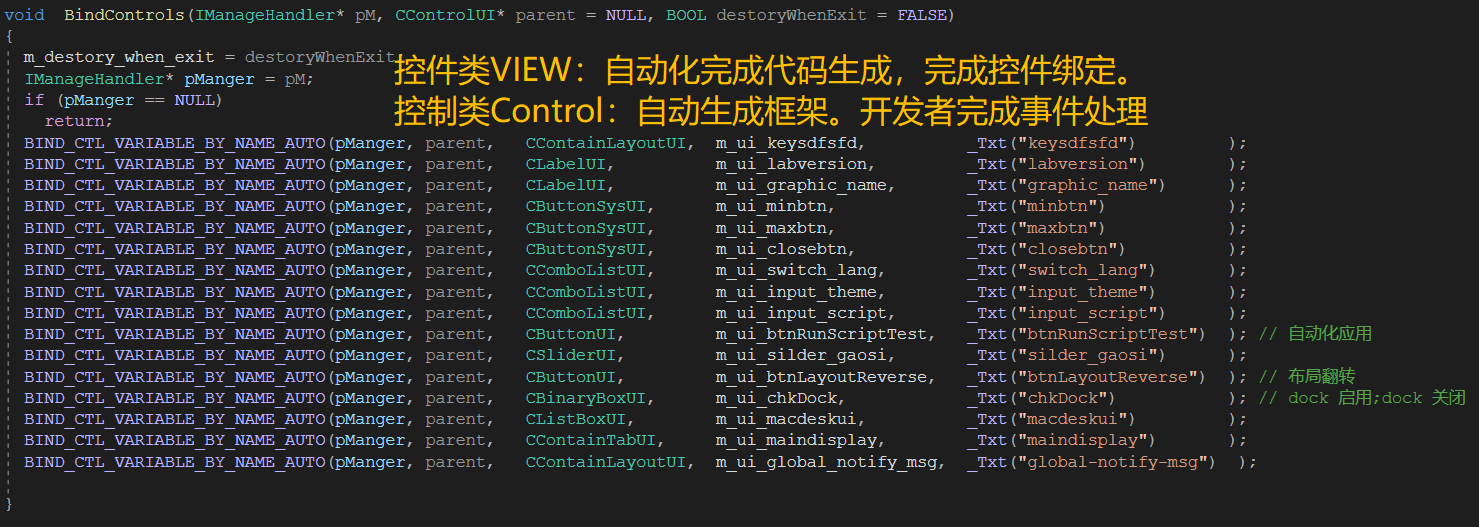
代码助手使用
- python环境。使用前请安装python
#检查是否安装python
python --version

启动命令行
#显示帮助信息
python3 generate_code_cpp.py -h
#代码生成
# --input 后面可以跟多个文件和文件夹
python3 generate_code_cpp.py --input "E:/CBlueUI/res/00_uidemo.xml" --output "E:/CBlueUI/res/code"
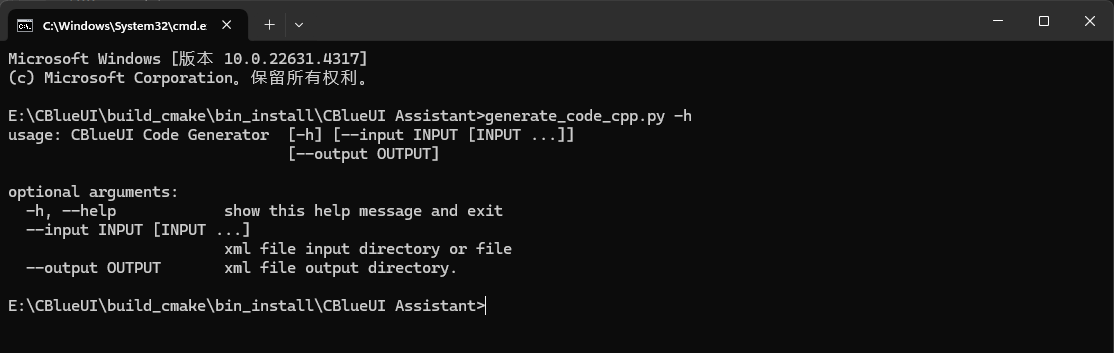
- 完成后,会生成C++源代码。将源代码添加到工程项目中参与编译即可。

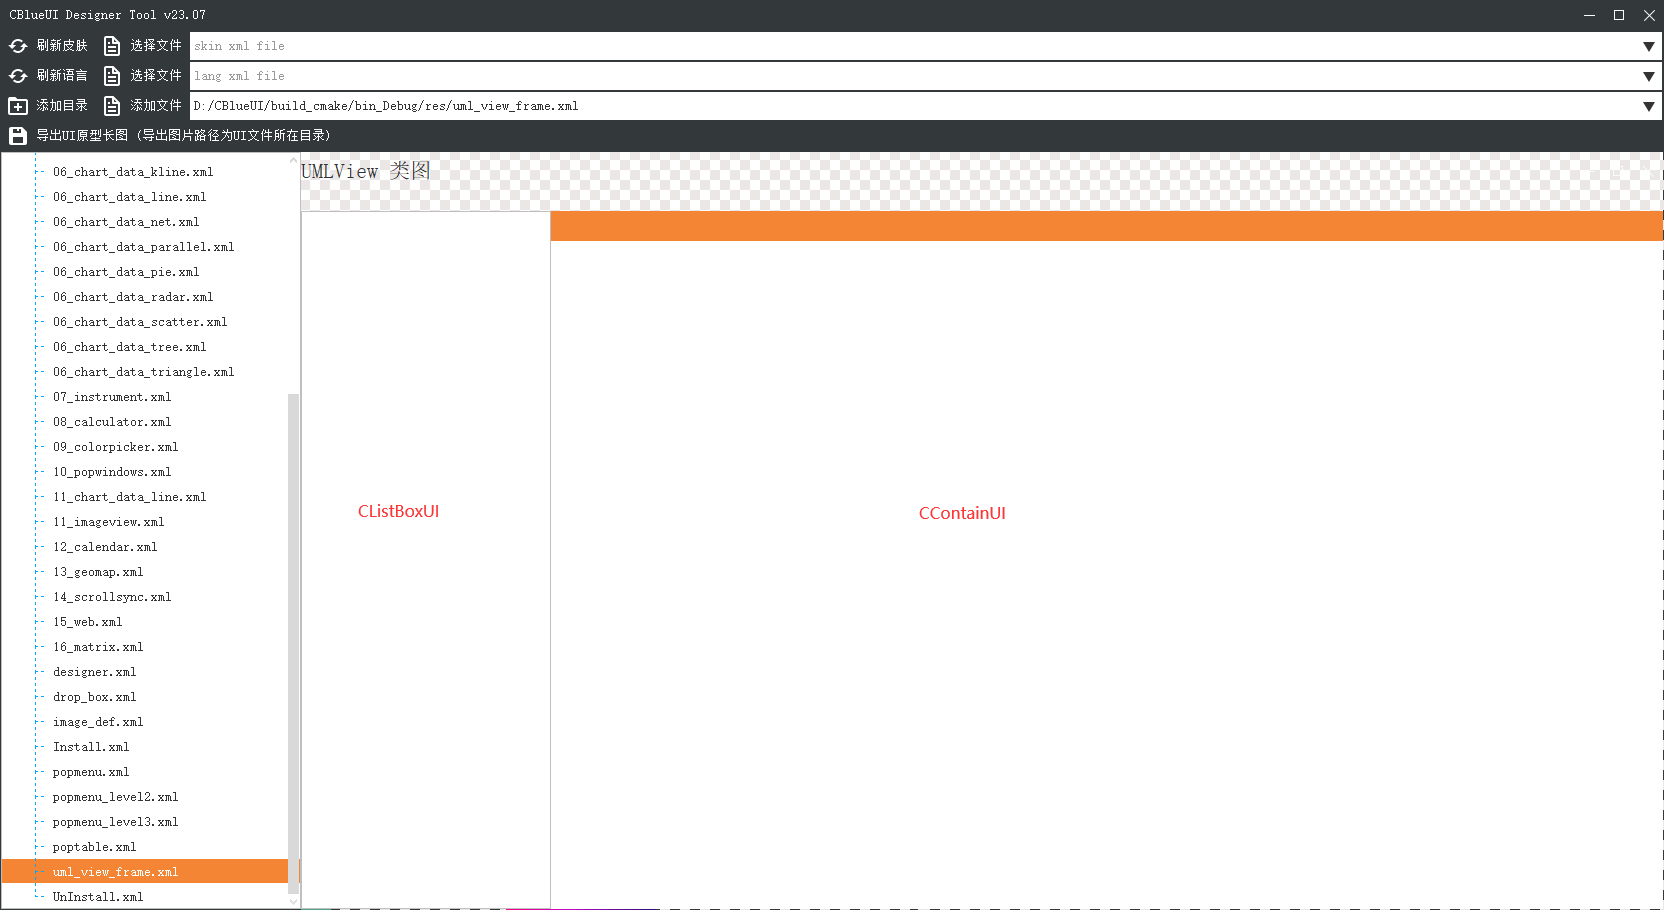
设计器